Skype for Business environment running with just one Public IP
/
For quite some time I’m running a home lab, first on a big server (HP Proliant DL360) and since beginning of this year I have a Intel Nuc, saves a lot of energy costs 😂
- Domain Controller and CA on Windows 2016 Core Edition
- Skype for Business Front-End Server on Windows Server 2012r2 standard
- SQL 2014 std for monitoring and persistent chat on Windows Server 2016
- Exchange 2016 on Windows Server 2016
- Skype for Business Edge on Windows Server 2016
- IIS ARR (Reverse Proxy) on Windows 2016
- PBX on Windows Server 2016
This lab was great for testing purposes but the problem was always, no connection to the outside world with Skype because of the requirement for at least 2 external IP’s with the use of Skype for Business.
*** To be clear, DON’T use this for production environments, this is not supported by Microsoft ***
So I started searching on the internet, could not find much about setting up a Edge Server with just one nic or 2 nic’s in the same subnet. Only on the site from Mark Vale I saw a blog article that he did the same setup with 2 nic’s and 1 public IP. The missing part for me was the Edge server configuration. How do I need to configure my networking. Check below to find out!
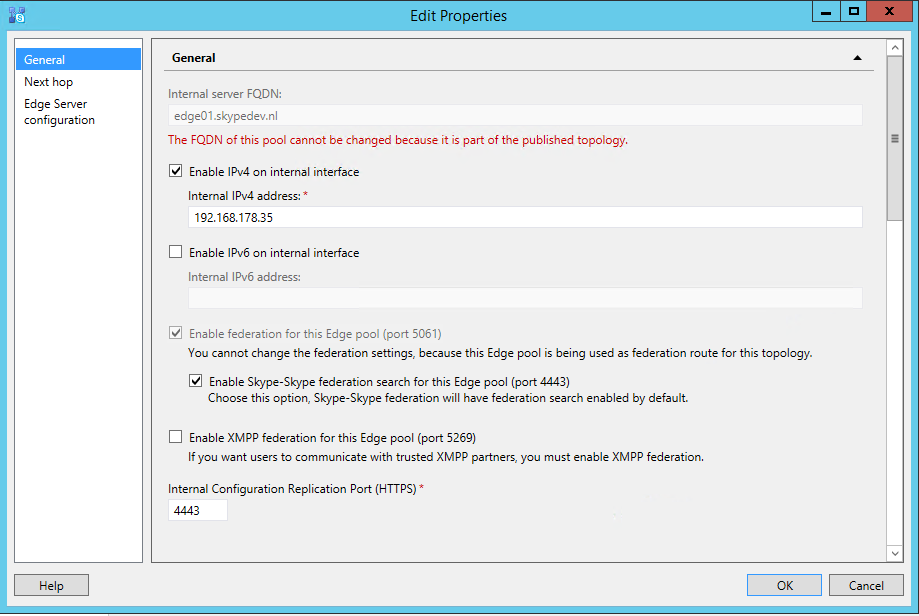
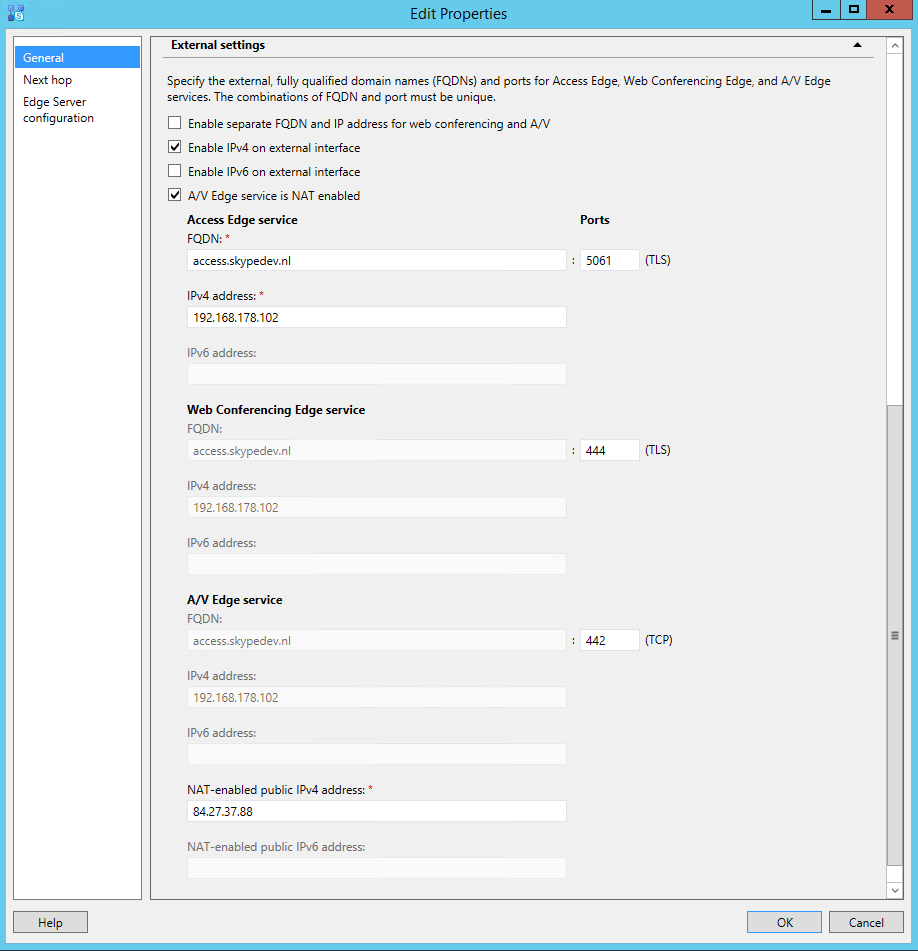
Deploy Edge Server on one single IP.
Deploy a single edge server with single IP via the Topology builder. Change the AV Edge port to 442 and add your public IP to the NAT-enabled public IPv4 address field. You can find your public ip when you go to this site (when at home of course). As alternative you can use this site (provided by Kaylee Ferreira).
>Network interfaces on your Edge Server
Create 2 Network interfaces on your Edge Server, rename one to Internal and the other one to External

On the internal network interface only set the Internal Edge site IP (192.168.178.35 with subnet 255.255.255.0). Leave Gateway and DNS empty. On the External Interface I leave the settings to DHCP (have configured a Static Release in my router). I’ve only changed the DNS to 8.8.8.8 (in this case the server is never going to resolve anything internal).
Hosts File
Now open your hosts file and add the following lines: 192.168.178.30 dc01.skypedev.nl 192.168.178.31 SKYPEFE01.skypedev.nl I always start Powershell as Administrator and go to “C:\windows\system32\drivers\etc” and enter: notepad hosts (this way you can save the file with administrator permissions)
Static routes
Display the interface index number with Powershell.
Get-NetIPAddress -AddressFamily IPv4 | Select ifIndex,IPAddress | ft -Autosize
Add at least 2 static routes to your internal interface, one for Domain Controller/CA and one for your Front-End Server.
		New-NetRoute -AddressFamily IPv4 -DestinationPrefix “192.168.178.30/32” -NextHop 192.168.178.1 -RouteMetric 1 -ifIndex 11
		New-NetRoute -AddressFamily IPv4 -DestinationPrefix “192.168.178.31/32” -NextHop 192.168.178.1 -RouteMetric 1 -ifIndex 11
Federation
After you have started don’t forget to setup your federation in Skype.