

Azure Communication Services (ACS) allows developers and organizations to embed real-time communication such as voice, video, chat, and SMS directly into applications.
One powerful capability is Direct Routing, which allows Azure Communication Services to connect to your own Session Border Controller (SBC) and existing telephony infrastructure.
This means you can route calls between Azure and your own SIP environment, PSTN provider, or PBX.
In this article we walk through the step-by-step process of configuring Direct Routing with Azure Communication Services.
Architecture Overview
Before we begin, it is useful to understand the architecture.
With Direct Routing, Azure Communication Services connects to your SBC over SIP TLS. The SBC then routes calls to your telephony environment or PSTN provider.
Typical architecture:
Application
│
Azure Communication Services
│
Direct Routing
│
Session Border Controller (SBC)
│
PBX / SIP Trunk / PSTN Provider
This approach allows you to integrate cloud communication services while maintaining control over your voice infrastructure.
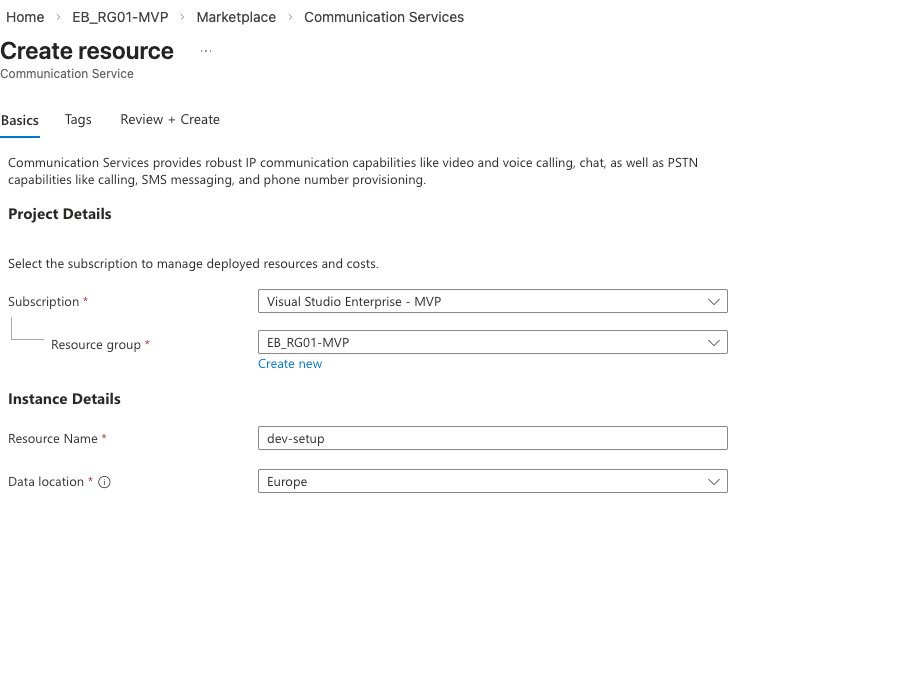
Step 1 – Create an Azure Communication Services Resource
First we need to create an ACS resource.
- Open the Azure Portal
- Click Create a resource
- Search for Azure Communication Services
- Click Create
- Configure the following:
- Subscription
- Resource Group
- Resource Name
- Region
- Click Review + Create
After deployment your Azure Communication Services instance will be ready to configure.
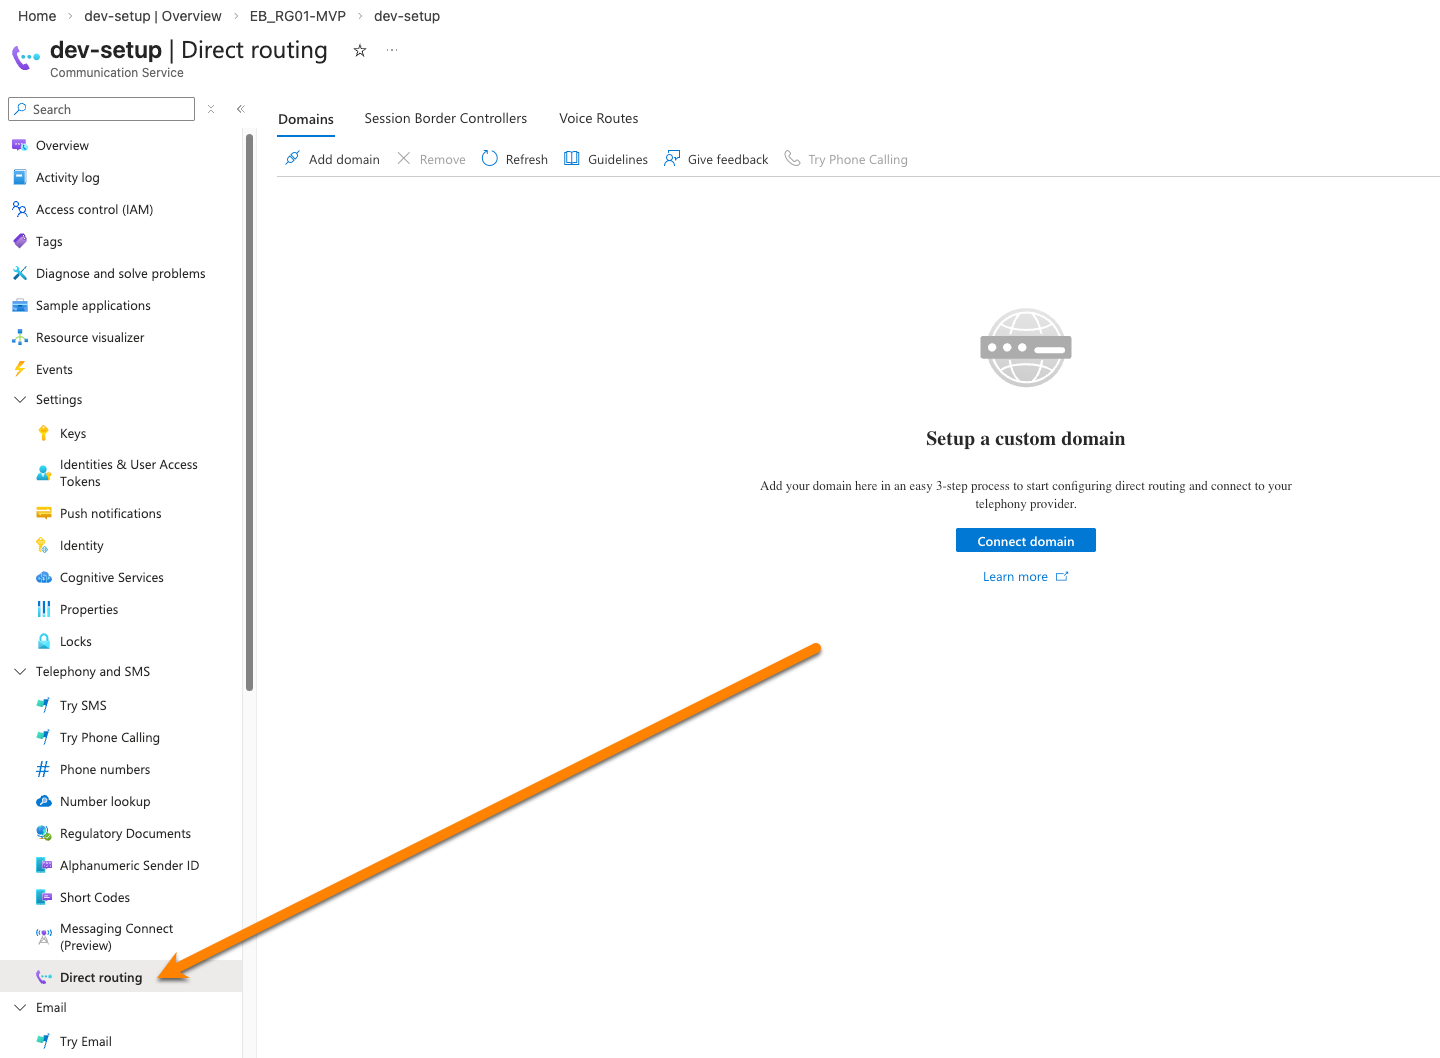
Step 2 – Open the Telephony Configuration
Next we configure telephony features.
- Open your Azure Communication Services resource
- Navigate to Telephony and SMS
- Select Direct Routing
This section allows you to configure the connection between Azure and your SBC.
Step 3 – Validate domain
To route calls, Azure must know which SBC to connect to.
- Click Connect Domain
- Enter your SIP domain
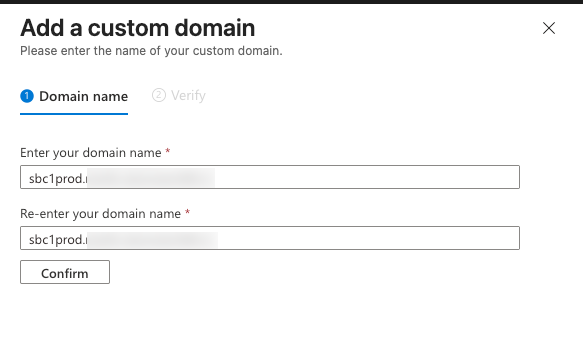
- Verify ownership through DNS verification
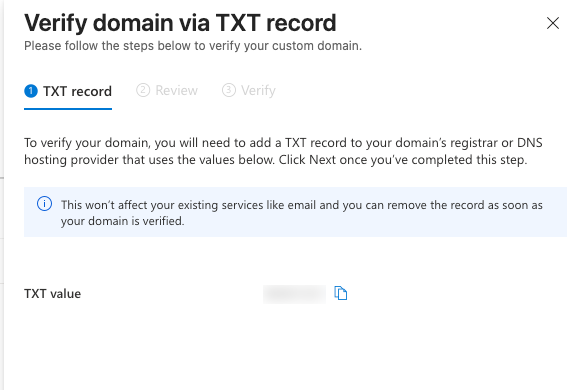
Once verified, the domain can be used for SIP identities and routing.
Step 4 – Configure Direct Routing
Azure Communication Services requires a verified domain for SIP addressing.
- Navigate to Session Border Controllers
- Click Configure Direct routing
- Enter your SIP FQN and port
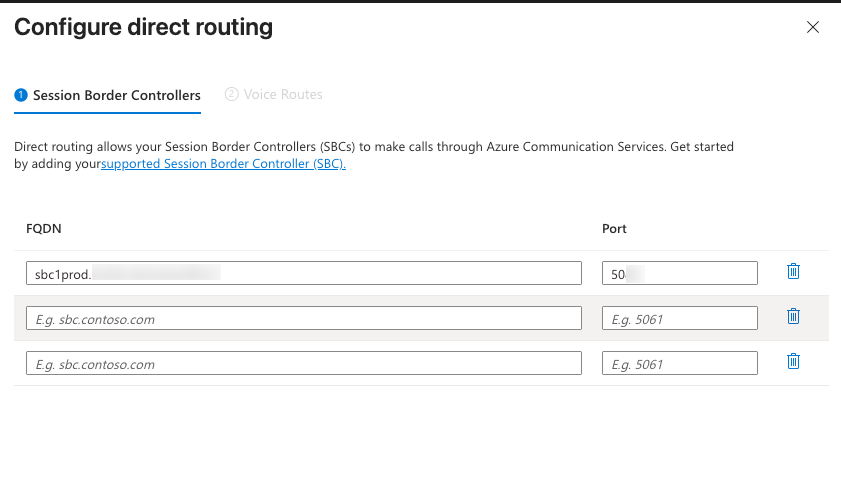
- Click Next
- Select the first route and enter a name
i.e.: Unrestricted - Insert the number pattern:
.* - Select your session border controller.
- Click Save
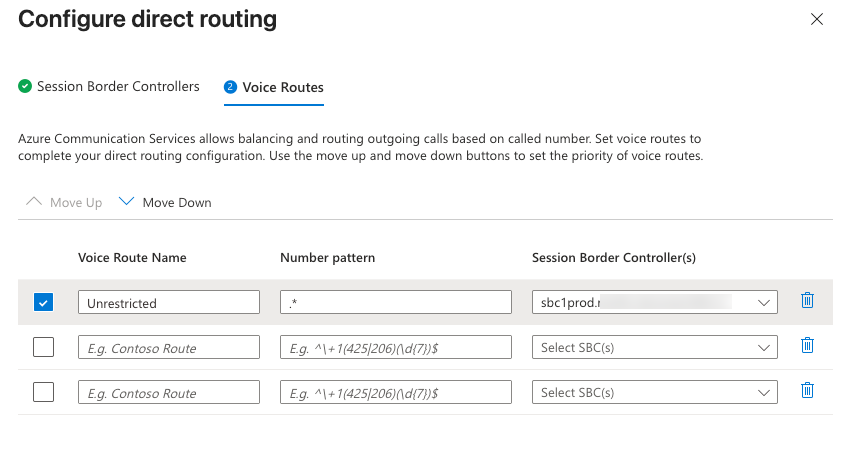
These routes determine how outbound calls are routed from Azure Communication Services to your SBC. When everything is configured correctly, Azure Communication Services will successfully route calls through your SBC.
When Should You Use ACS Direct Routing?
Direct Routing with Azure Communication Services is particularly useful when you want to:
- Integrate telephony into your own applications
- Maintain control over PSTN connectivity
- Use your existing SIP infrastructure
- Connect cloud communication services to enterprise telephony platforms (for example: Dynamics365 Contact Center)
It provides a flexible architecture where Azure handles communication services while your SBC manages telephony routing.
Final Thoughts
Azure Communication Services combined with Direct Routing provides a powerful way to integrate telephony capabilities into modern applications.
By connecting ACS to your own SBC you can leverage:
- Azure scalability
- Existing SIP infrastructure
- Custom call routing
- PSTN connectivity
All while maintaining full control over your telephony environment.
If you’re building communication-enabled applications or integrating voice into business workflows, ACS Direct Routing is a powerful tool to have in your architecture.