OpenVPN in Kali Linux
This how to describes how to configure Kali to use a openVPN for securing your traffic.
Why should u use VPN?
Here’s my top 5 why you want to use a VPN service.
  1. VPN provides Privacy and hides your own External IP address.
  2. Use any network (public or private or free (hotspot WiFi) with encryption.
  3. Login to your home or Work network from anywhere with confidence of encrypted traffic.
  4. Bypass censorship and content monitoring  by goverments.
  5. Browse and bypass Firewall and censorship policy from Anywhere!
As you can see from the list above, VPN not necessarily hides everything. Search engines like google, bing and yahoo can still recognizes you based on your cookies or account sign-in. So make sure you use tools like Bleachbit (clear browsing data etc) and enable plugins in your browser for tracking and ads (privacy badger, uBlock Origin or Privacy.net analyzer).
In the example below i’m using IPVanish VPN service, there are lot’s more VPN services. If you really want to be sure of logging, security and availability you can use the comparison chart (click here).
1 - Enabling VPN on Kali Linux

The following command enables all sorts of VPN and PPTP in the network manager:
apt-get install network-manager-openvpn-gnome network-manager-pptp network-manager-pptp-gnome network-manager-vpnc network-manager-vpnc-gnome
2 - Download and extract openvpn certs from IPVanish
Download the complete bundle of *.ovpn files and cert from here. From the commandline you can wget the *.zip file:
wget https://www.ipvanish.com/software/configs/configs.zip

Move and unpack the files:
mv configs.zip /etc/openvpn/
Unpack files:
unzip -q configs.zip

3 - Config Network Manager to use IPVanish profile
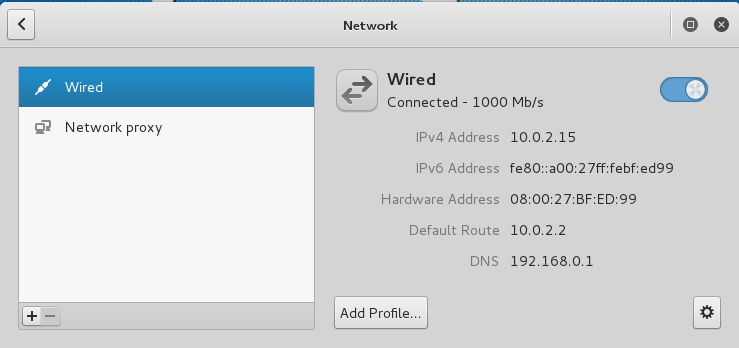
Go to your network configuration and click on the + (below left)
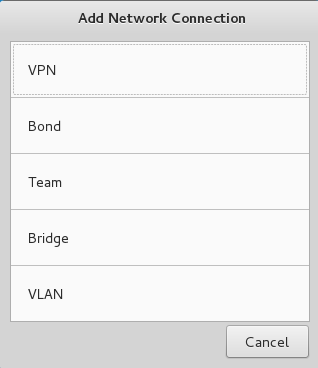
Choose the option VPN and then Import from File

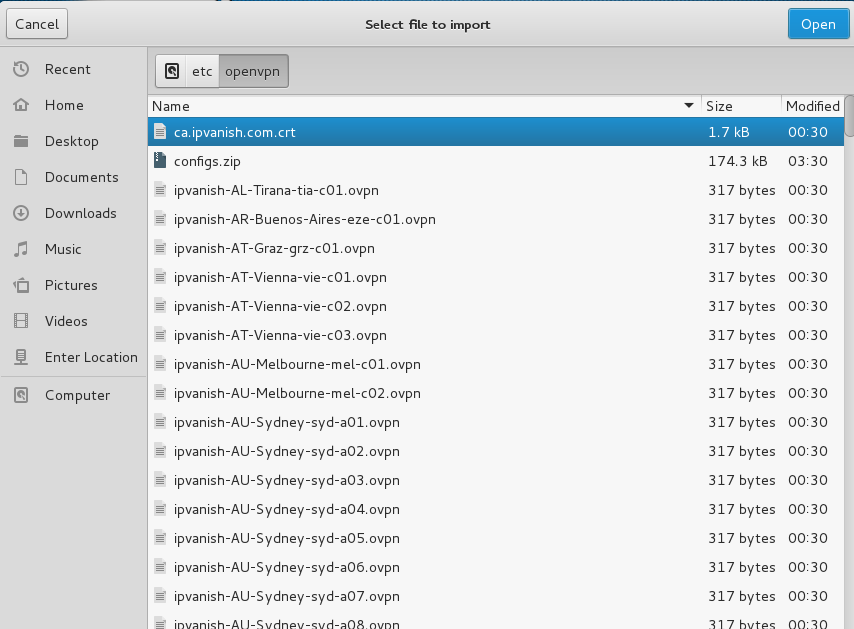
Browse to the /etc/openvpn directory and pick one of the *.ovpn files you want to use.
On the next screen you can configure your username and password. (everytime u start the VPN you will be asked to enter the password)
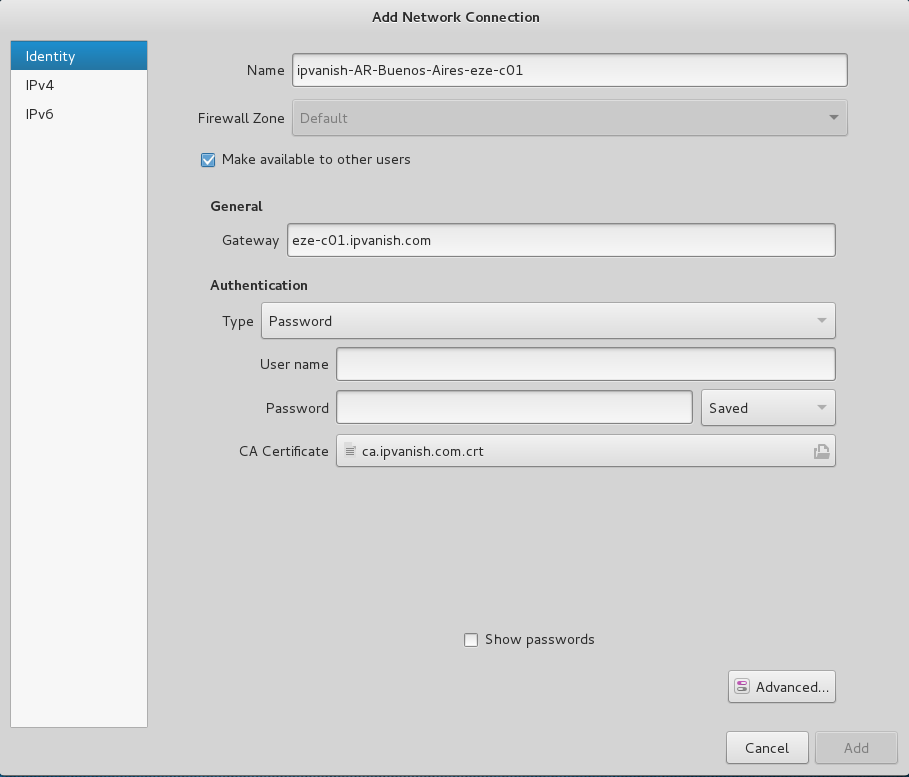
As you can see, the CA Certificate is configured from the config file so you don’t have to pick this one by yourself. Click on Add to finish the import.
Once back on the Network Config you can enable the VPN connection and you are done with setting up a VPN!
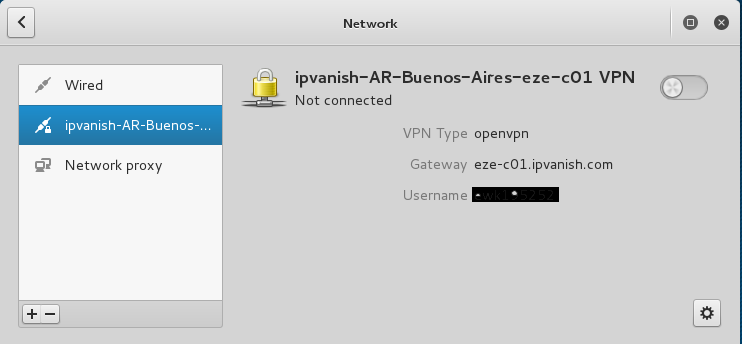
Check your connectivity
Now let’s check the external IP Address:
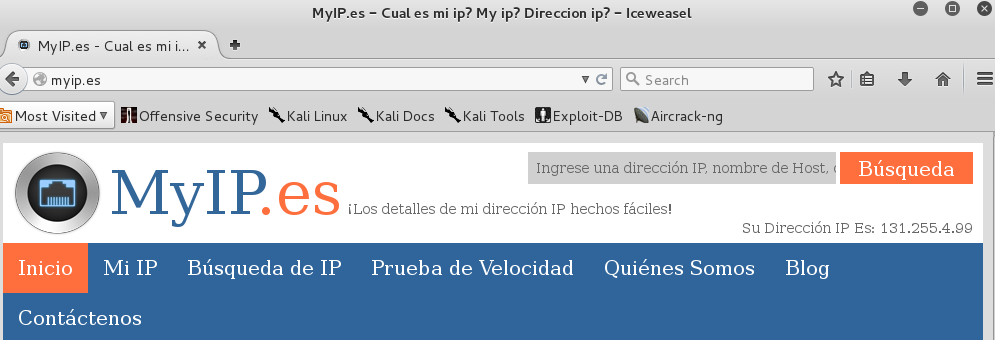 As you can see, we are using 131.255.4.99 right now.
Happy Safe Browsing!
