Setup Charles Proxy for Microsoft Teams
What is Charles Proxy
Charles is an HTTP proxy / HTTP monitor / Reverse Proxy that enables a developer to view all of the HTTP and SSL / HTTPS traffic between their machine and the Internet. This includes requests, responses and the HTTP headers (which contain the cookies and caching information).
Install Charles Proxy
You can download the latest version from charlesproxy.com For a full version you will need to buy a license. (It’s worth the $)
/
Configure
Install the Charles Proxy Root Certificate in the trusted root certification authorities.
Charles uses its own Root SSL certificate for SSL requests through Charles to hosts enabled for SSL Proxying. The Root certificate is generated automatically for each Charles installation.
Because Charles has signed the Root certificate itself, it won’t be trusted by your browsers or applications. In order to use the SSL Proxying feature in Charles you therefore need to add the Root certificate for your copy of Charles to the trust-store on your OS, and perhaps in your browser (ie: FireFox).
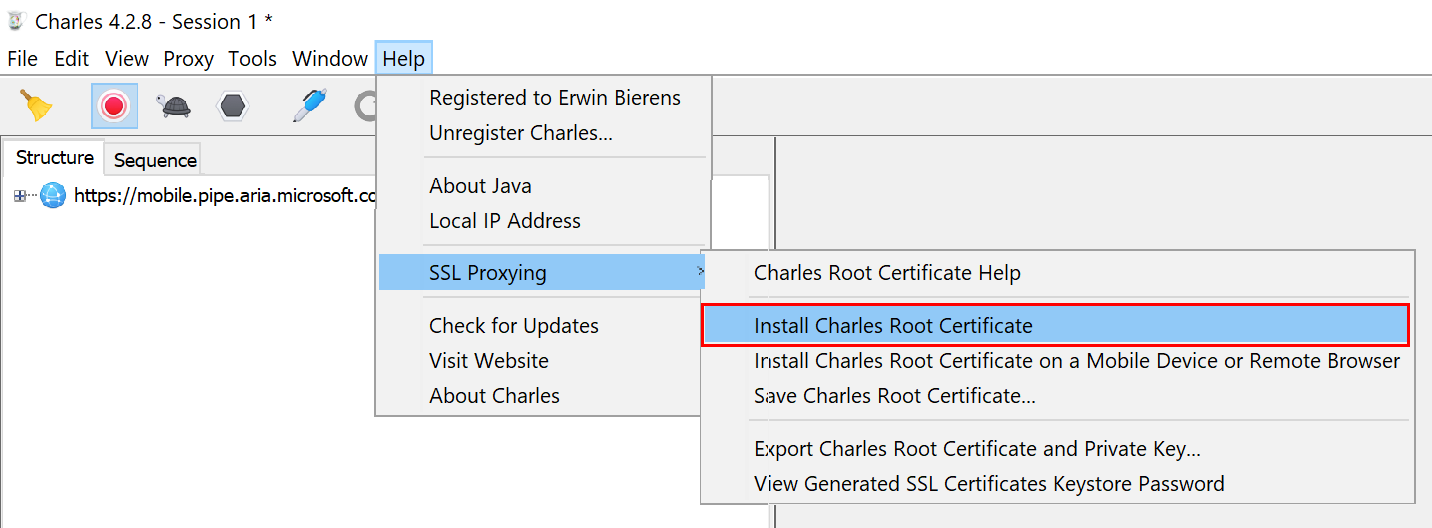
Go to the Help menu, SSL Proxying, Install Charless Root Certificate.
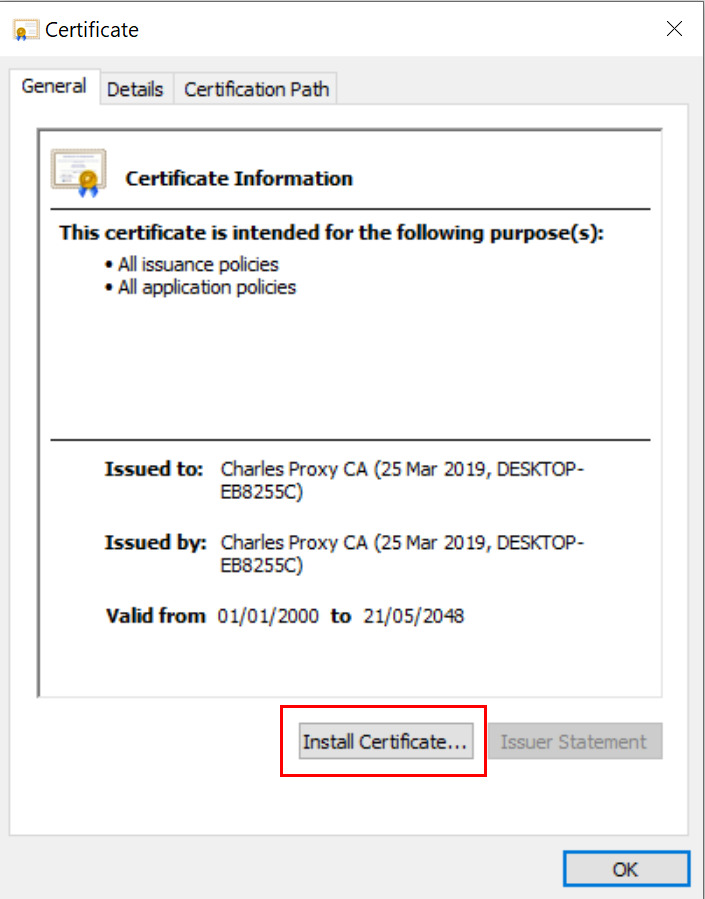
Click Install Certificate.
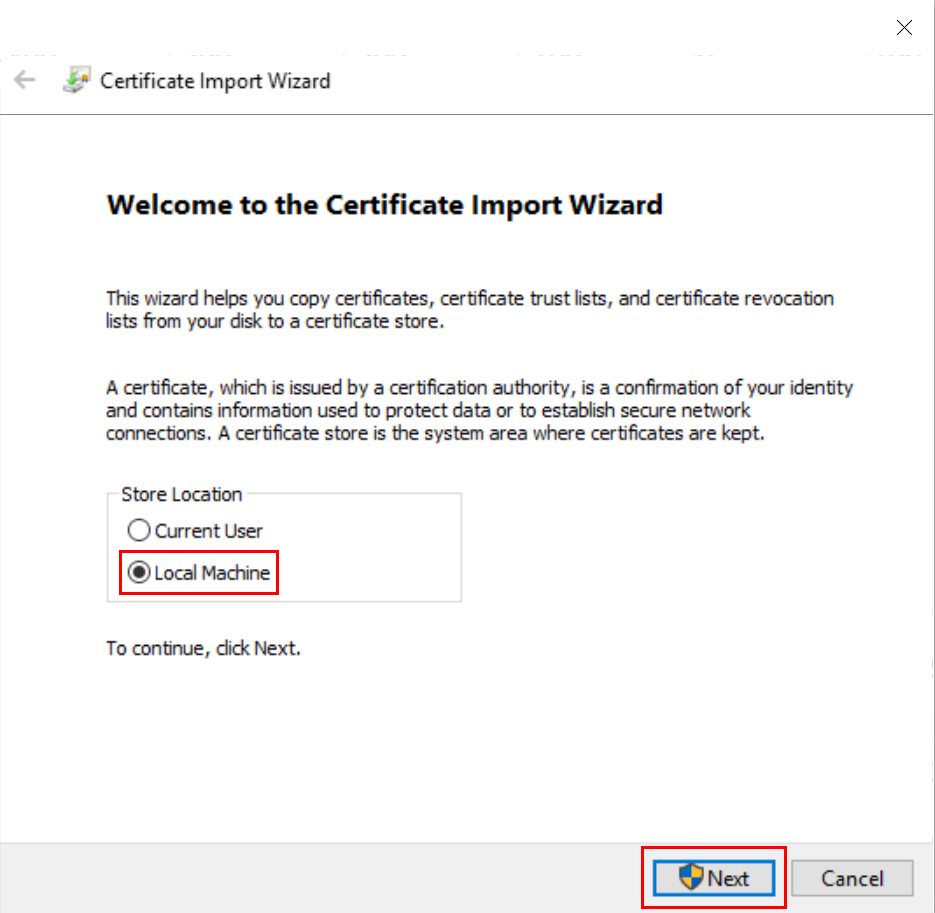
Choose Local Machine and click Next.
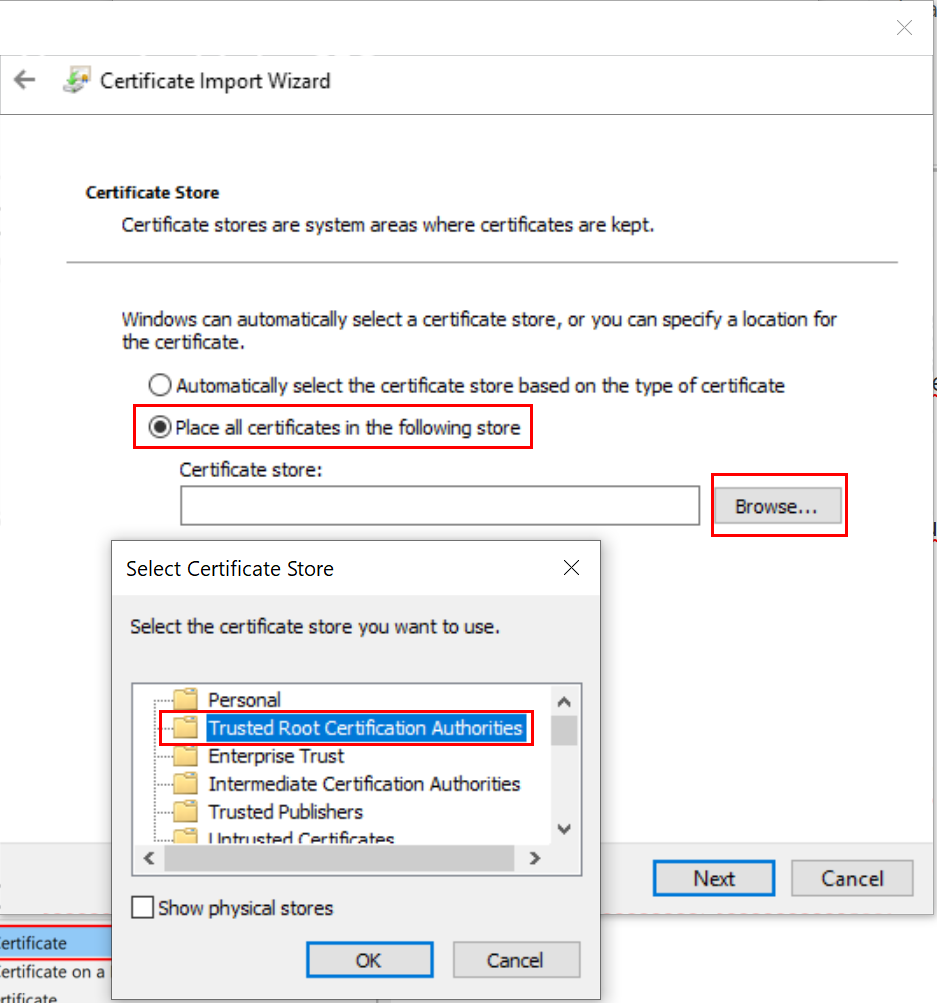
Select Place all certificates in the following store and click Browse. Select Trusted Root Certification Authorities as store, Click OK.
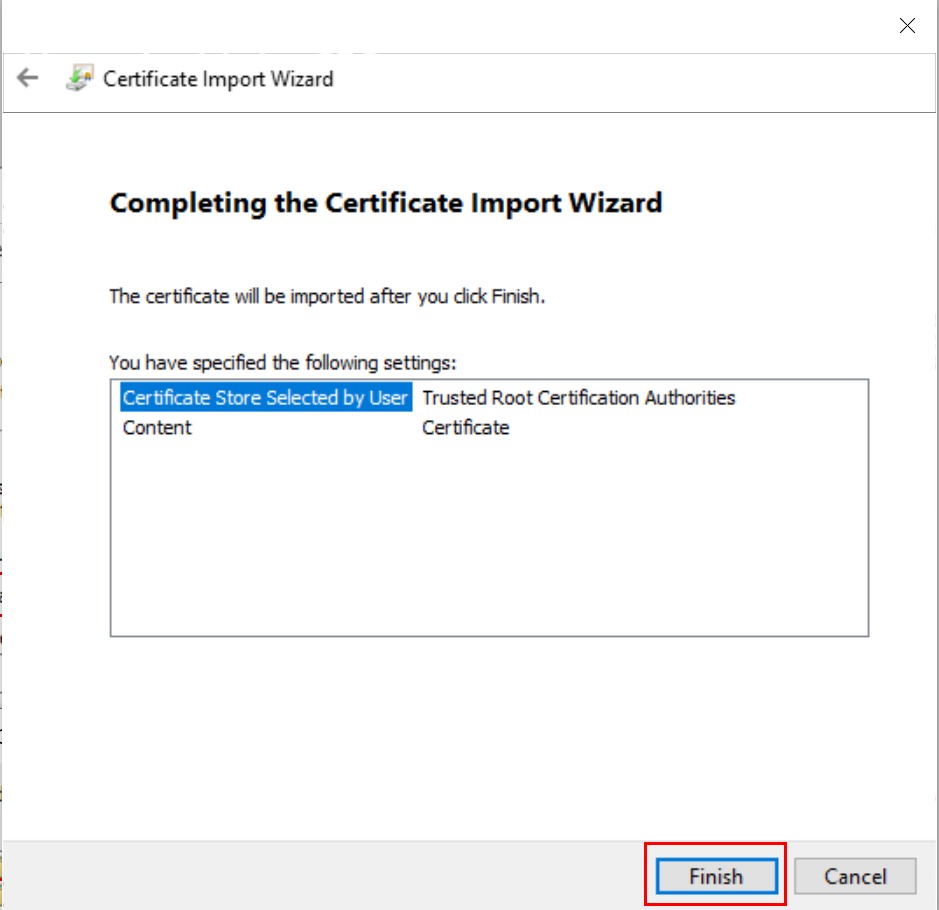
In the UAC click OK and click Finish.
The root certificate is now installed.
Set Proxy Settings
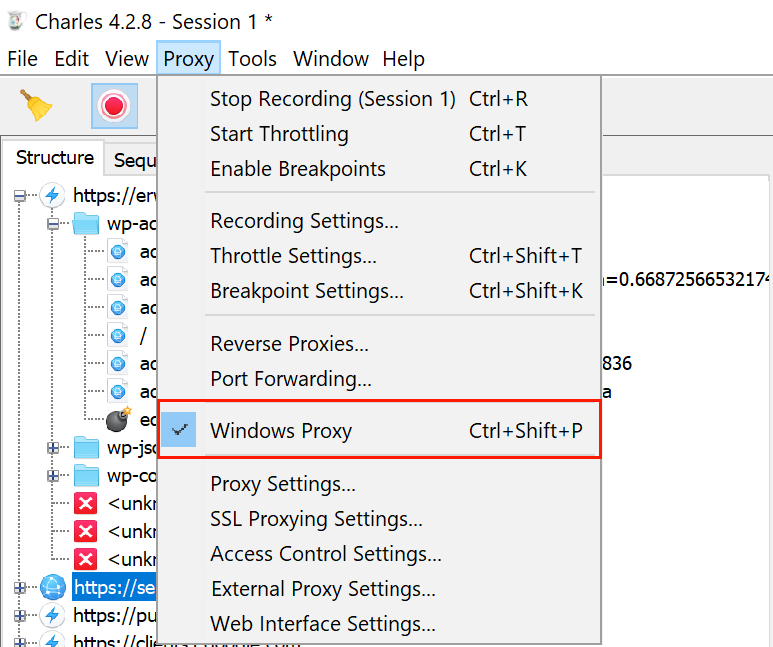
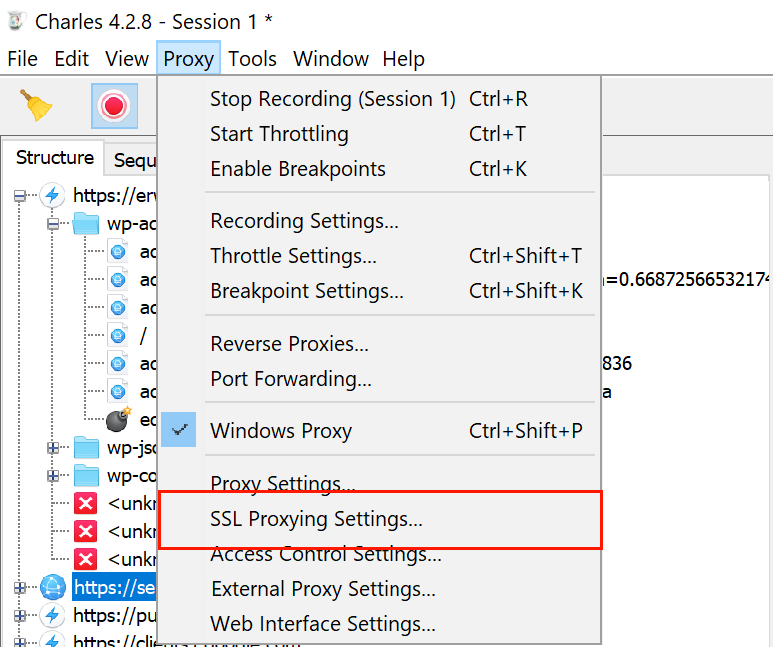
Enable the Windows Proxy from the Proxy Menu.
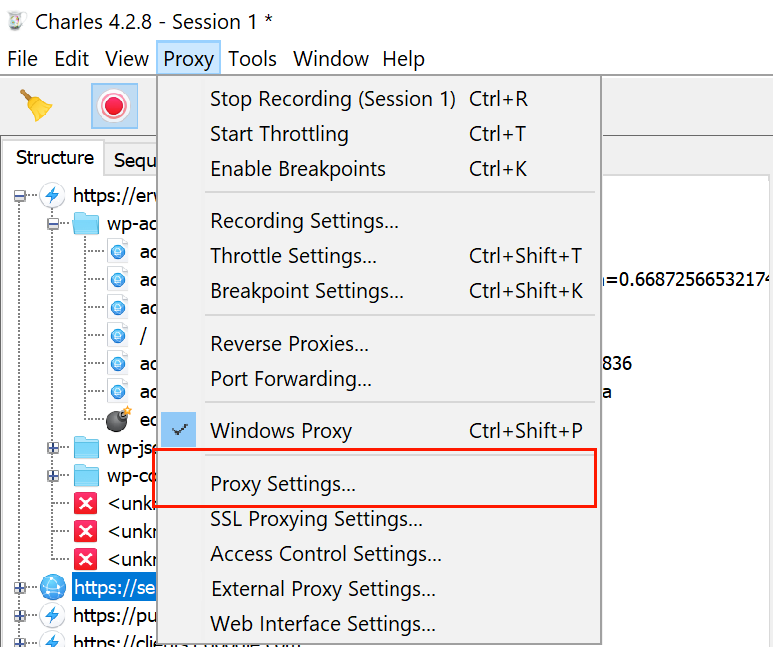
Click the Proxy menu > Proxy Settings.
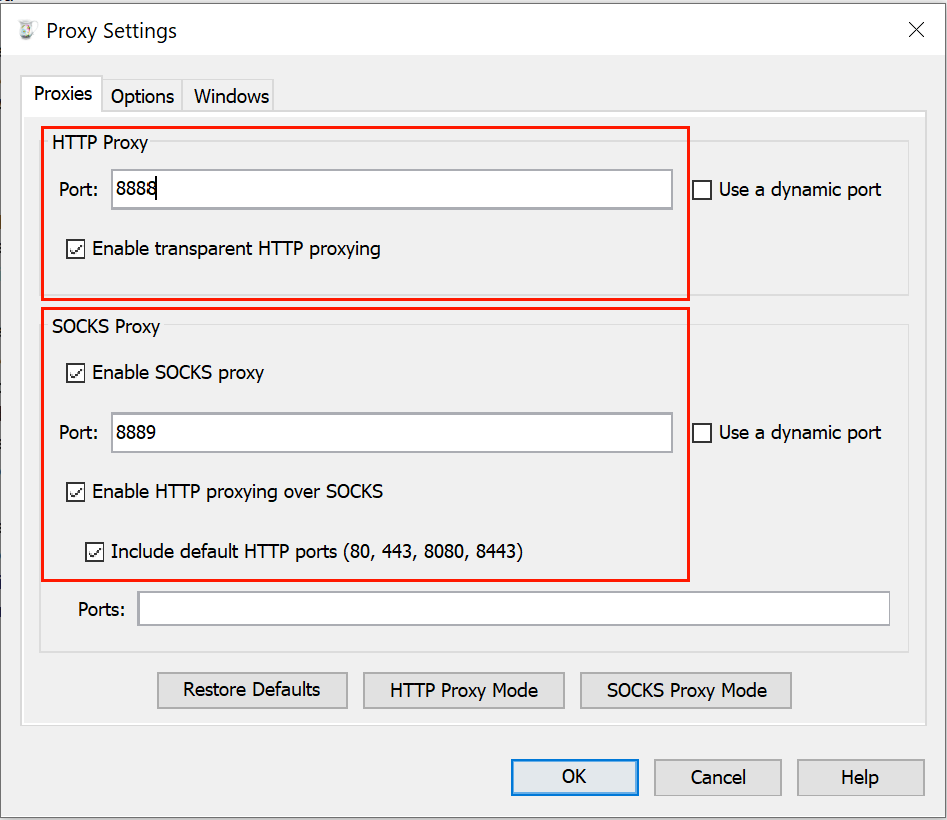
Enable HTTP Proxy and SOCKS Proxy like the image below.
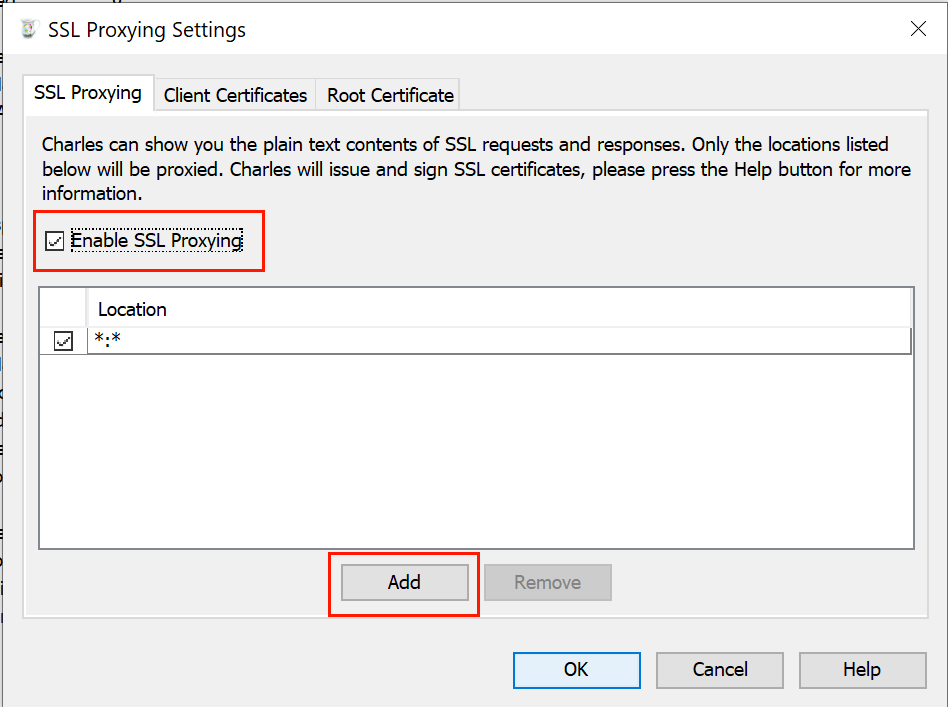
From the Proxy Settings Menu go to SSL Proxy settings.
Enable SSL Proxying and Click Add.
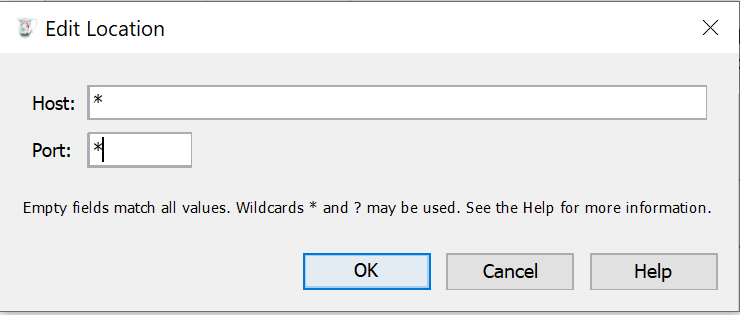
Add ***** for host and ***** for port.
Click OK to exit settings.
Close your Microsoft Teams Client and Click the broom icon to clear logging.
Startup your Microsoft Teams Client and start debugging!

